
# DI 란?
DI 는 Dependency Injection 의 약자로, 말 그대로 '의존성 주입'을 의미한다. 스프링에서는 클래스 간의 의존 관계를 스프링 컨테이너를 통해 자동으로 연결해주는 덕에, 의존성을 주입해야하는 것을 알아야 한다는 것이다.
의존성을 주입하는 방법에는 여러가지 방법이 있는데 차근차근 따라해보자.
먼저 InteliJ 를 실행시키고 (인텔리제이 다운로드는 아래 링크를 참고하자)
https://www.jetbrains.com/ko-kr/idea/download/#section=mac
다운로드 IntelliJ IDEA: 우수성과 인체 공학이 담긴 JetBrains Java IDE
www.jetbrains.com

src > main > java > 의 경로에 폴더를 하나 생성해주고, 거기에 Dependency(의존성) 을 만들어줄 JAVA Class 를 두개 생성해주자.
나는 쉬운 이해를 위해 Restaurant (음식점) 이라는 클래스와 Chef (요리사) 라는 클래스를 만들어봤다.
음식점은 요리사가 없으면 오픈을 할 수 없으니, 요리사에 의존하고 있다고 생각하고 DI 를 부여해보자!
먼저 Restaurant 클래스에는 다음과 같이 코드를 작성하자
package com.example.DItest.dependency;

import lombok.Data;
import org.springframework.stereotype.Component;

@Component // Spring 에서 해당 객체를 관리하겠다는 어노테이션
@Data
public class Restaurant {
}
그리고 이제 Chef 클래스에 주입을 하는 방법을 알아보자
# 1. 필드 주입
package com.example.DItest.dependency;

import lombok.*;

import org.springframework.stereotype.Component;

@Component
@Data
public class Chef {
    @Autowired // 필드주입
    private Restaurant restaurant;
}여기서 private Restaurant restaurant 부분에 final 을 붙이면 오류가 나게 된다.
필드 주입 시, 생성자 호출 -> 스프링이 해당 필드를 주입 :: 이 순서이기 때문에 위 처럼 바로 호출할 때, 레스토랑의 값은 없기 때문이다.
# 2. 세터(Setter) 주입
ackage com.example.DItest.dependency;

import lombok.*;

import org.springframework.stereotype.Component;

@Component
@ToString
@Getter
public class Chef {
 @Autowired // setter 주입 : 필드가 메모리 할당되고 나서
    // 스프링이 메소드를 이용해 주입 : 스프링 컨테이너 뿐 아니라 외부에서 주입 가능
    // 위와 다른 점은 "외부에서 직접 주입이 가능" 하다는 것임
    // 알아서 주입하려는 게 아니라 우리가 원하는 setter method 를 써야할 때
    // @Data 를 사용하면 Autowired 가 안 들어가기 때문에, @ToString @Getter
    // 를 따로 사용하고, Setter method 를 재정의 하고 하면 된다
    public void setRestaurant(Restaurant restaurant) {
        this.restaurant = restaurant;
    }

}생성자 초기화가 필요한 게 아니라 '부분만 수정'이 필요한 경우, setter 를 이용해서 의존성을 주입하게 된다.
필드주입을 했을 경우에는 기존에 저장해뒀던 정보가 초기화되어버리기 때문에 이를 방지하기 위함이다!
# 3. 생성자 주입
package com.example.DItest.dependency;

import lombok.*;

import org.springframework.stereotype.Component;

@Component
@Data
public class Chef {

  private final Restaurant restaurant;
    @Autowired
    public Chef(Restaurant restaurant) {
        this.restaurant = restaurant;
    }
    // setter 와 생성자 주입은 비슷함 하지만 초기화 시점이 다르다
    // setter : 모든게 다 정리가 된 이후에 초기화
    // 생성자 : 다 정리되지 않아도 바로바로 초기화 가능! -> final 을 써도 된다
    //            왜냐하면 값이 메모리에 할당하는 동시에 초기값으로 주입됨
}이처럼 setter 와 달리 바로 초기화 및 주입이 가능하다는 이유 때문에, null 값을 바로 캐치할 수 있다.
따라서 오류 (Null Pointer Exception)를 줄일 수 있다는 장점과 함께 StackOverFlow 를 막을 수 있다는 안전성도 있다.
생성자는 다음과 같은 두가지 방법으로도 주입이 가능하다.
 package com.example.DItest.dependency;
import lombok.*;

import org.springframework.stereotype.Component;

@Component
@Data
@RequiredArgsConstructor // 생성자로 주입할 필요가 없을 때, final. @NonNull 이 붙은 필드만 초기화
public class Chef {
 	private final Restaurant restaurant;
} package com.example.DItest.dependency;
import lombok.*;
import org.springframework.stereotype.Component;
@Component
@Data
@AllArgsConstructor // 전체 필드를 초기화하는 생성자로 주입이 필요할 때
public class Chef {
private final Restaurant restaurant;
}보통 생성자 주입 없이 final 값을 쓰게 되면 오류가 나는데, 이를 방지해 주는 방법이 위 두가지 방법이다.
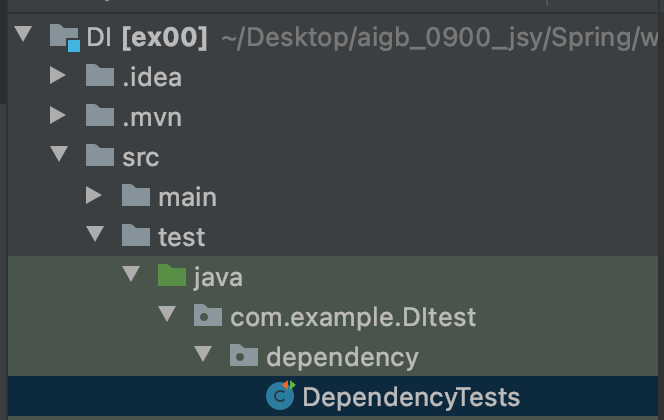
이렇게 다양한 방법들을 통해 주입한 값들이, 잘 주입이 되었나 확인하고자 할 때는 src > test 에 폴더를 생성해 주고 실행해보자.
나의 경우 DependencyTests 라는 클래스를 하나 만들어주었다. 의존성 테스트를 위해 사용한 코드는 다음과 같다.
package com.example.DItest.dependency;

import lombok.extern.slf4j.Slf4j;
import org.junit.jupiter.api.Test;
import org.springframework.beans.factory.annotation.Autowired;
import org.springframework.boot.test.context.SpringBootTest;

@SpringBootTest // 단위테스트 환경으로 만든 것
@Slf4j // 로그 출력 라이브러리
public class DependencyTests {

    @Autowired
    private Chef chef;

    @Test
    public void checkDI(){
        log.info("--------------");
        log.info("chef : " + chef);
        log.info("restaurant " + chef.getRestaurant());
        log.info("--------------");
    }

}그리고 이 메소드의 checkDI 부분을 실행하게 되면

위 사진과 같이 의존성이 잘 주입이 된 것을 볼 수 있다!
오늘은 이렇게 스프링에서 어떻게 의존성을 주입하는 지에 대해 알아보았다. 다음에는 Autowired 이라는 것을 배워보도록 하자!
'𝑾𝑬𝑩 > 𝑆𝑃𝑅𝐼𝑁𝐺' 카테고리의 다른 글
| [프로젝트] 빌드 관리 도구 선택 - Maven VS Gradle (0) | 2022.12.28 |
|---|---|
| [Spring] AOP (0) | 2022.11.19 |
| JPA 와 MyBatis 의 차이 (ORM, SQL Mapper) (0) | 2022.11.17 |
| [Spring] REST API, REST, RESTful 이란? (0) | 2022.11.05 |
| [Spring] JAR or WAR 차이 (0) | 2022.11.03 |